Thursday 13 June 2019

Conservative conservatory

Here's hoping this works. I am going solo on this posting, without the help of Norma or Janine.
I'm afraid it will be rather a rushed job as we're flying out of Sydney tomorrow morning at 6am to Zurich via Dubai, but I thought I should show you the nearly finished Conservatory.

I am calling it a conservative conservatory as it is without a lot of colour. Madame who inhabits the boudoir and conservatory, only likes white plants and lots of greenery.


Looking from the boudoir into the conservatory.


I couldn't find a wire plant stand that I liked so I made this one. It does look a bit English Victorian, but I believe Madame got it as a present from an 
English friend. The white geraniums (pelargoniums) are doing well

I also made some lily of the valley and a frangipani.


On the right are some fragrant gardenias and a
white orchid in the center

I will start on the exterior when we return from Europe.

Thanks for having a look at what is a pretty poor effort, but I think I've done it! And on my Ipad at that!
Hugs, Linda


Monday 6 May 2019

Let there be light

My Conservatory is coming along slowly but in the meantime I thought I'd show you the central light fixture. It was fairly easy to do and it does seem to suit the space.


Below are some off-cuts of very thin brass, left over from scissors I purchased from DollsHouse Mall. Unfortunately there was not a long enough piece to go around the glass dome so I had to cut two pieces. I used a very small hole punch to make three holes in the brass strip. The really tricky bit was working out the distance between the holes. Mathematics was never my strong suit so it was a matter of luck. I guess if I measured the circumference and divided by three that would have worked. The fact that I had to overlap the two brass pieces complicated things!

Photo below shows the glass dome that I started with. Sorry about the order! I bought this from Michaels.
The actual light fitting was one from a table lamp. This photo below shows one that was going to work, but the bulb was not replaceable. Also, the table lamp that I used had two struts that not only added interest but held a larger jump ring in place. If you have a look at the first photo above, you can see that I glued the brass strip to the top of the upturned dome, after I had placed three tiny brass jump ring in the three holes - I think I used Quik Grip. Then I joined on three pieces of chain. At the neck of the upturned lamp I attached the chain to the larger jump ring. To finish the top edge I used a tiny bit of gold braid.

If you look closely you will see the lamp hanging from the ceiling , which isn't there yet!

I hope this has made some sort of sense! Stay tuned for the next blog as I show plants, etc. Thanks for looking!

Friday 1 March 2019

Close encounters and into the future

Well here I am again. I promised Janine I would try to post again soon so as not to forget what she had taught me. So here I am and it is already March here in Australia. I thought I would give you a close-up look at some of the components of my "boudoir". I mentioned that the round windows were made from the lids of yoghurt pots. The only hard part to these was painting them to look like sandstone.

Somehow I can't get these photos to go where I want them! But these are the before and after of the round windows.


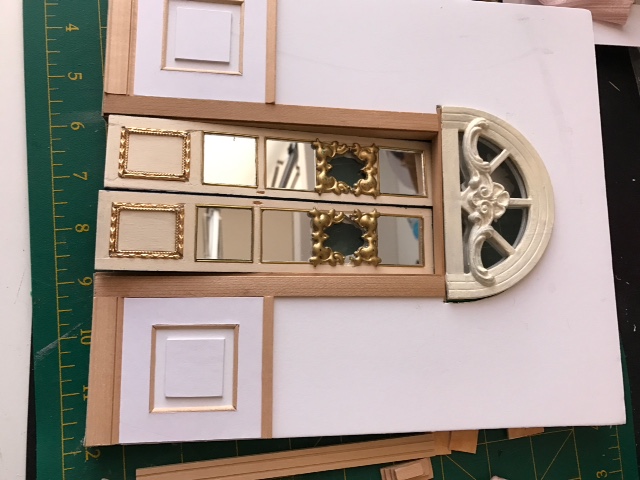
These are the before and after of the front doors. I used a basic 4 panel glass door and boarded up all but one window on each door. I then used "puffy stickers" to embellish the door before it was painted. I found these fabulous stickers at the dollar store and of course they have never been available again. They are so easy to paint, cut, etc. I have used them extensively on the interior as well - painted gold.

This is the interior of the front doors. I used 4 mirrors to block out the windows and again used "puffy stickers", this time colouring them gold and adding some trim at the bottom from "gold" bangles found at thrift stores.
This is a close-up of slippers I made on 60 hpi silk canvas. I had done a cushion on 56 hpi so I thought 60 wouldn't be any more difficult. I was wrong. This will probably be the first and last on 60!

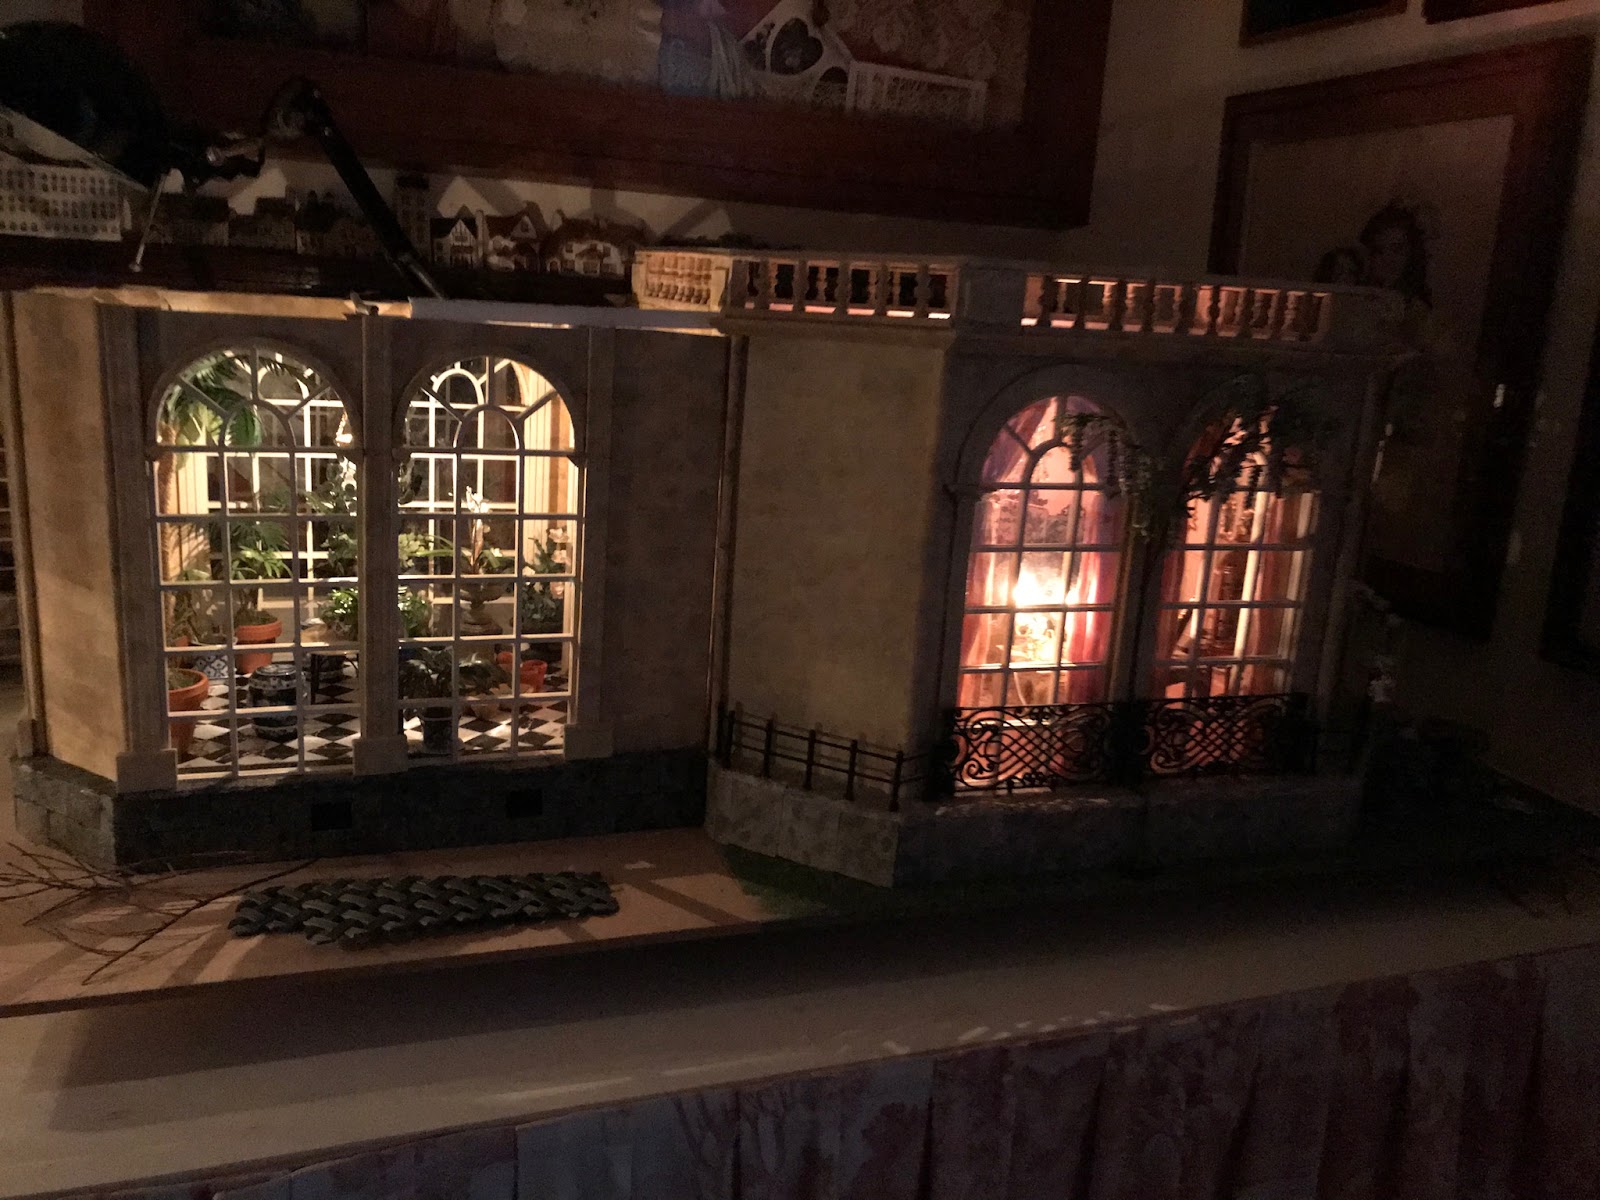
This is the arrangement I showed in the last post - I think it was cut off a bit then. I made most of these from tissue paper.


And now for the Future bit!
The Conservatory addition is coming along. Here is the floor, made from Contact paper (the sticky backed paper used for lining shelves, etc). I found it at our big hardware chain which is similar to Home Depot in North America. I was lucky enough to find it in white and black marble effect. It is so easy to use as there is a grid pattern drawn on the back to help with cutting. The floor grates ( which are not showing up in this photo) are pieces of a Chinese wooden fan. Not sure if they are for heating the conservatory or for drainage, but I thought they belonged! As with the boudoir, I am building the conservatory from 10mm. foam core and balsa wood.

Stay tuned for more on the conservatory. I hope to get much more done in the next week but a bathroom renovation (in RL) and a visit from the Canadian grandchildren for 2 weeks, may cramp my style a bit.
Thanks for visiting!

Tuesday 19 February 2019

At last!

It has been  LONG, LONG time since I posted. Thanks to Janine http://www.minworks.blogspot.com, I'm back!
Since building the Ladies Emporium, I have made a French Pavilion or, as I like to call it, a Ladies Boudoir.


I've made this structure from foam core as I do not cut wood - well, not very well! Foamcore is amazingly strong and is so easy to manipulate. The round window frames are from lids of my morning yoghurt. Beautiful pots at front door are by Elizabeth Causeret. Over the front door is a bigger yoghurt lid cut in half and embellished.


Side view with wisteria, half finished. The front wall of the pavilion is removable, as is the roof.

Looking in from the front door, I have a lovely chaise longue and a beautiful carpet, both by Norma Bennett Miniatures. In the corner cupboard is my English silver tea service from Dimitri Shevchenko of St. Petersburg. Both of these friends can be found on Facebook.


The beautiful French Mantel Clock is by Keith Bougourd at Small Time and the sewing box is by Chris Malcolmson. On the right behind the screen is a selection of perfume bottles, and a fabulous mannequin by Elizabeth of studioeminiatures http://www.studioeminiatures.blogspot.com

Looking from the back door towards the front entrance.

The desk of Madame is actually a dining table from Alison Davies Miniatures and shoes are by Patrizia Santi.

And finally, a closer look at my beautiful silver (which I adore) and two beautiful white jars by Elizabeth Causeret. The petit point cushion is one of mine as are the flowers, sitting on the Alison Davies small console.
I hope you have enjoyed this little look at my "Boudoir". It will soon be joined by a Conservatory full of plants (eventually!)
And I promise to post again before another 2 years!
Mini hugs to all, Linda